FTP stands for File Transfer Protocol, this process is how you will be moving your website files from one Hosting Server to another. Our guides will be using Filezilla which you can use for either a Windows OS or Mac, but it won’t be much different if you are using Fetch on a Mac instead. If you read the Getting Started page you should already have your FTP Username, Password and Hosting IP address ready. Go ahead and Launch your Filezilla desktop icon.
- In “Host” put your Hosting IP Address or Domain Name
- Put your FTP Username and Password in.
- Connect with Port 21 and select “Quickconnect”.
(Click on the image to see a larger view)
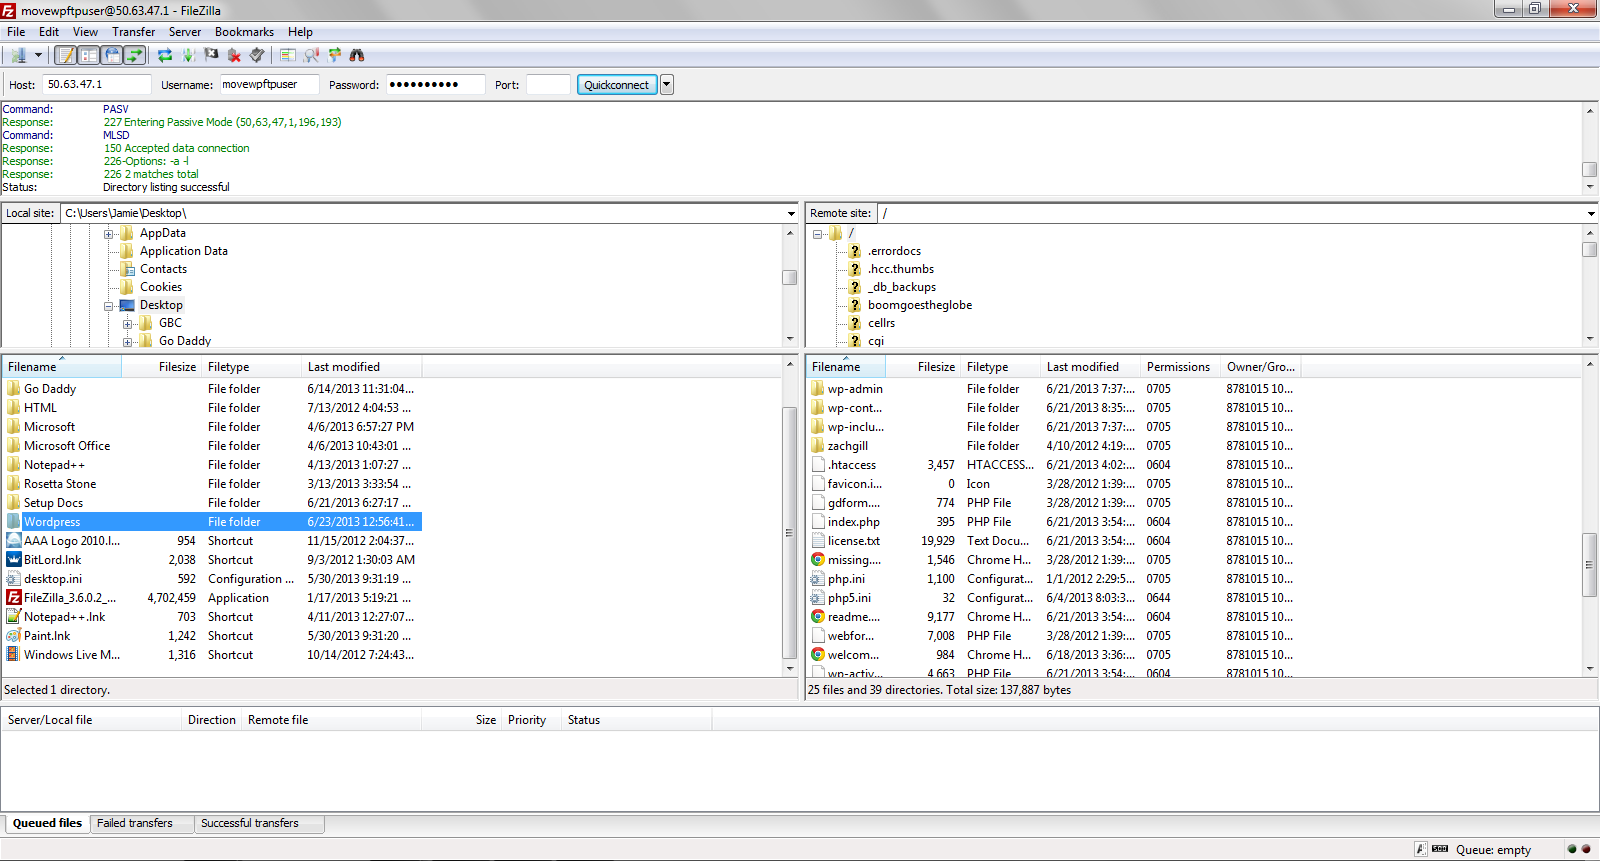
Your desktop is on the left hand side and your website files are on the right. Now that were connected hop over to the “From Current Hosting” page to get started!
Pro FTP Tip
Do you want to move your files over faster? Of course you do! Filezilla by default is set to only handle 2 simultaneous transfers at a time, but you can quickly change this anywhere from (1-10) at a time. I personally have mine set to 8 to push files quicker and at a safe rate to prevent the server from viewing your connection as any kind of threat.
Start by clicking the ‘Edit’ option in the top left, and got to ‘Settings…’.

Then click on the ‘Transfers’ page from the left, and Maximum Simultaneous Transfers will be the first option. Set this to (8) and then click ‘OK’ at the bottom of the page.
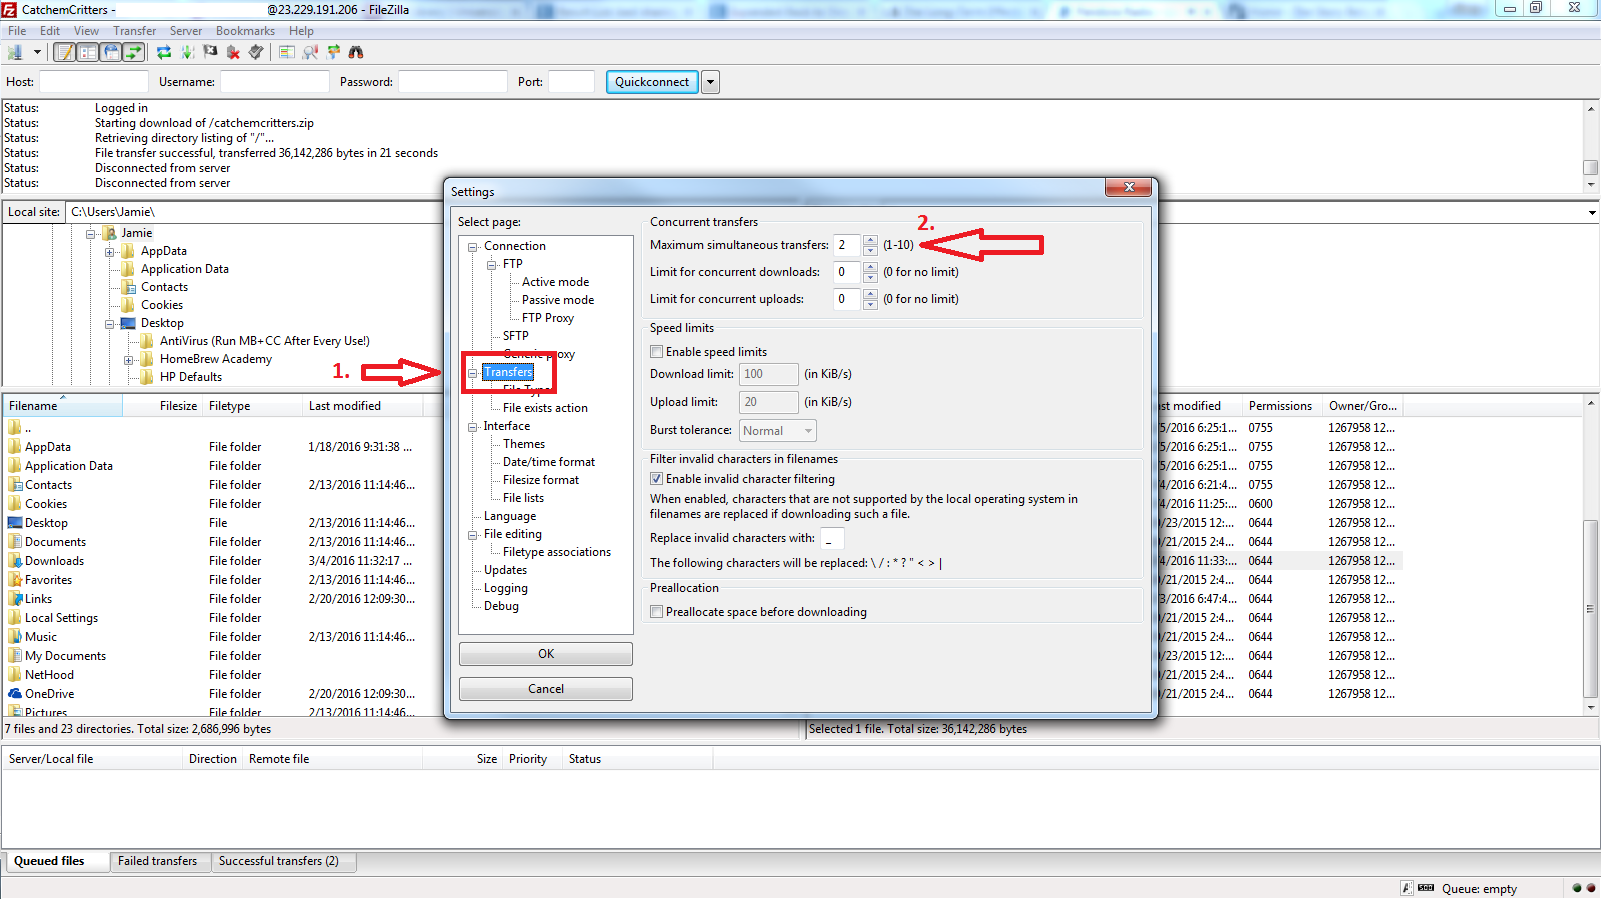
You should now see a significant change in the speed you’re able to upload and download all your files through FTP!