Now that we’ve connected to your old host with your FTP credentials, you need to download the files to your computer.
(PRO TIP: You only need to download the wp-content folder and Database if WordPress is already installed on your new Host).
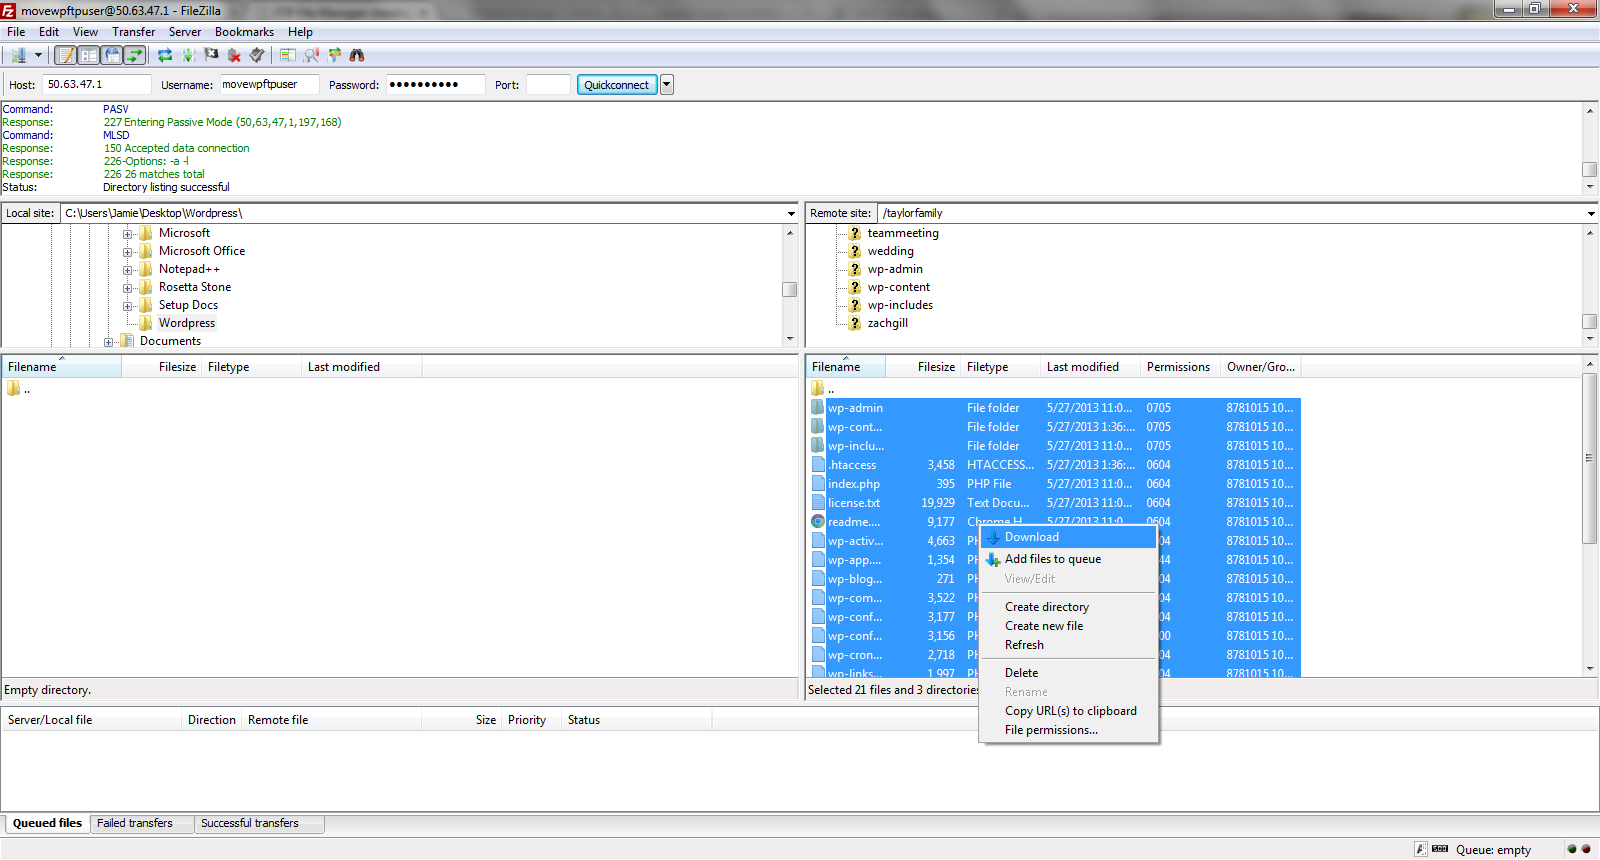
1. Double-click the “WordPress” folder you’ve created on your desktop on the left hand side, this is where we’ll be downloading the files to. On the right hand side select all the files you see, (wp-admin, wp-content, wp-includes folders and all other files in the root) most of them will actually have a “wp” in front of them. To select all of them at once, hold Control+A, or hold down your Control Key on your keyboard and click on each file/folder individually. Once they are all selected, right click on the files and select “Download”, this will download the files into your WordPress folder on your computer.
Once you have downloaded the files you should see them on your desktop folder “WordPress” on the left hand side.
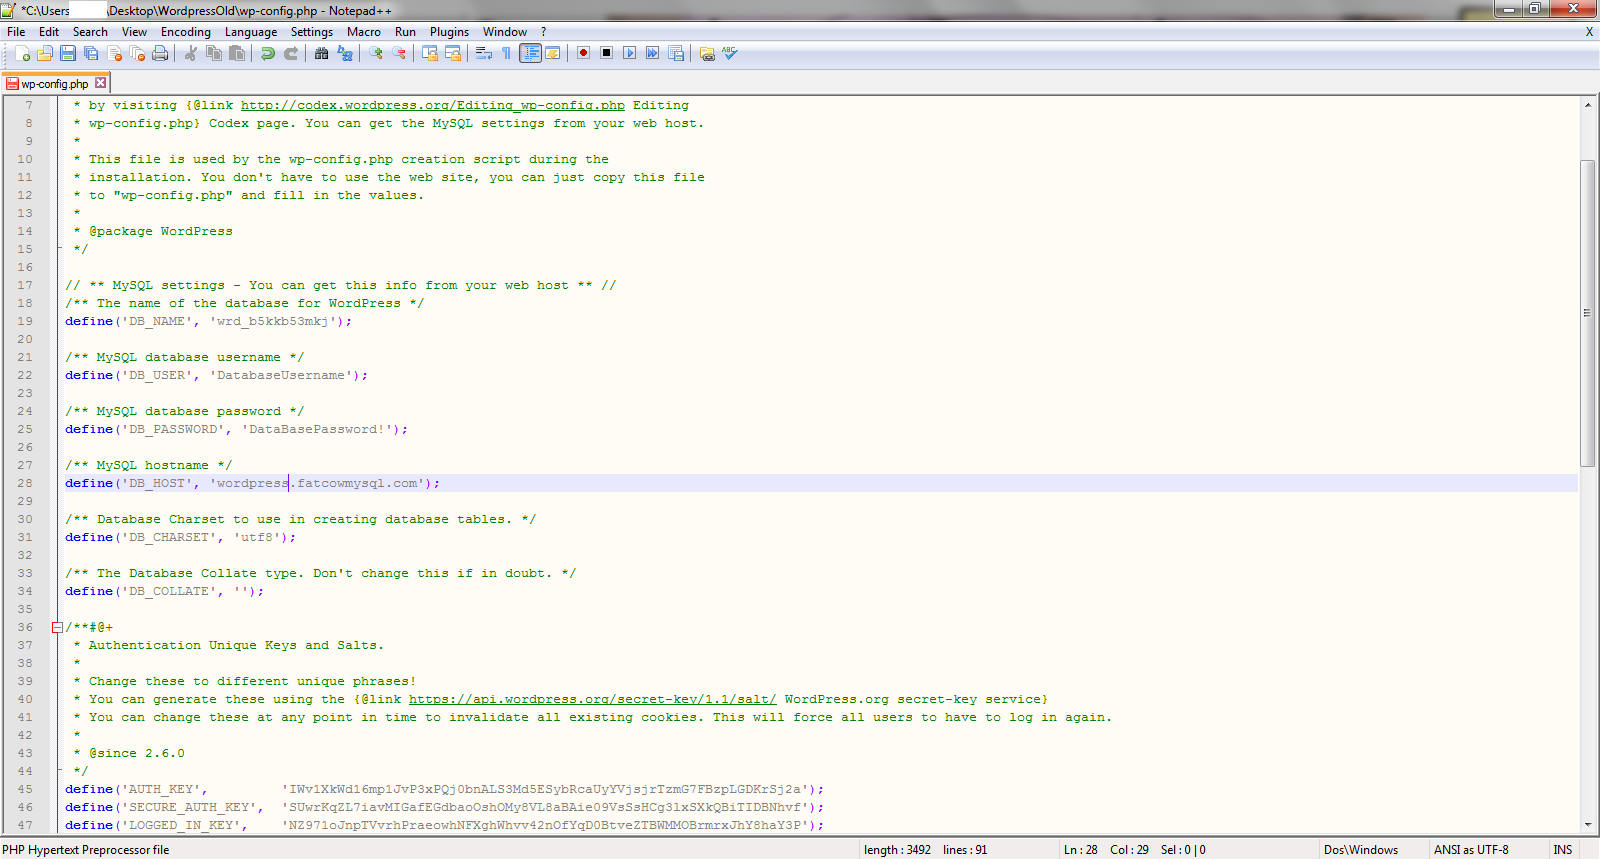
2. Next we’ll be exporting your database (which holds all of your Posts/Pages), before we can log in you’ll need to find your Database Username and Password. These are located in your “wp-config.php” file you just downloaded, on lines 22 and 25.
*If you are using cPanel or have access to phpMyAdmin move to step 4.
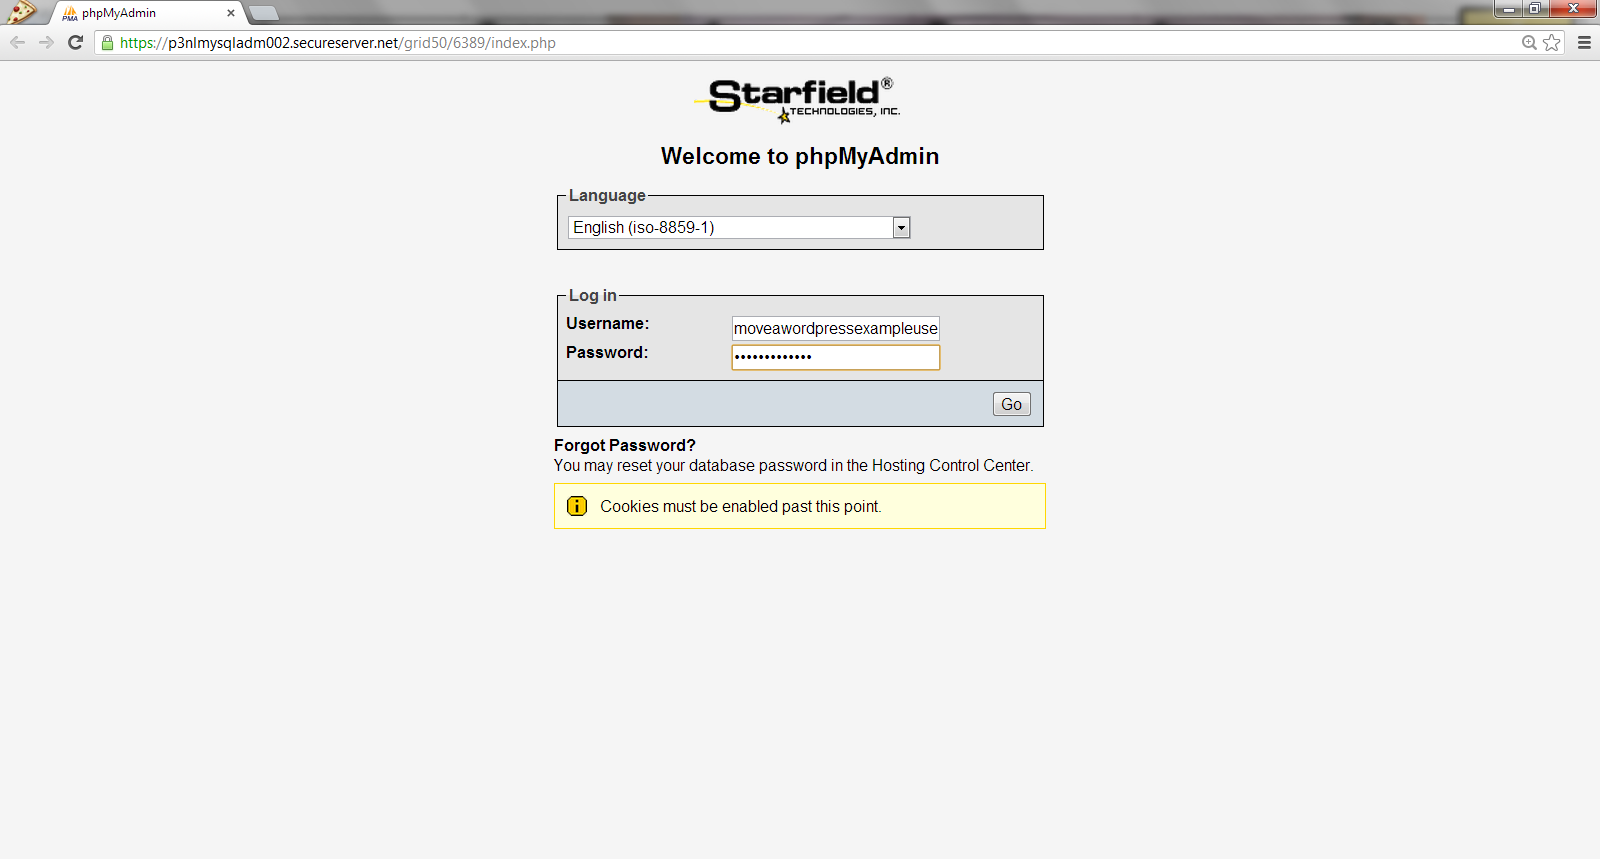
3. You may need to ask your current Hosting Provider where to find the phpMyAdmin login. Typically you will go into your Hosting Control Center, click on MYSQL and select phpMyAdmin. Log in with the Username and Password we just got from your wp-config.php file.
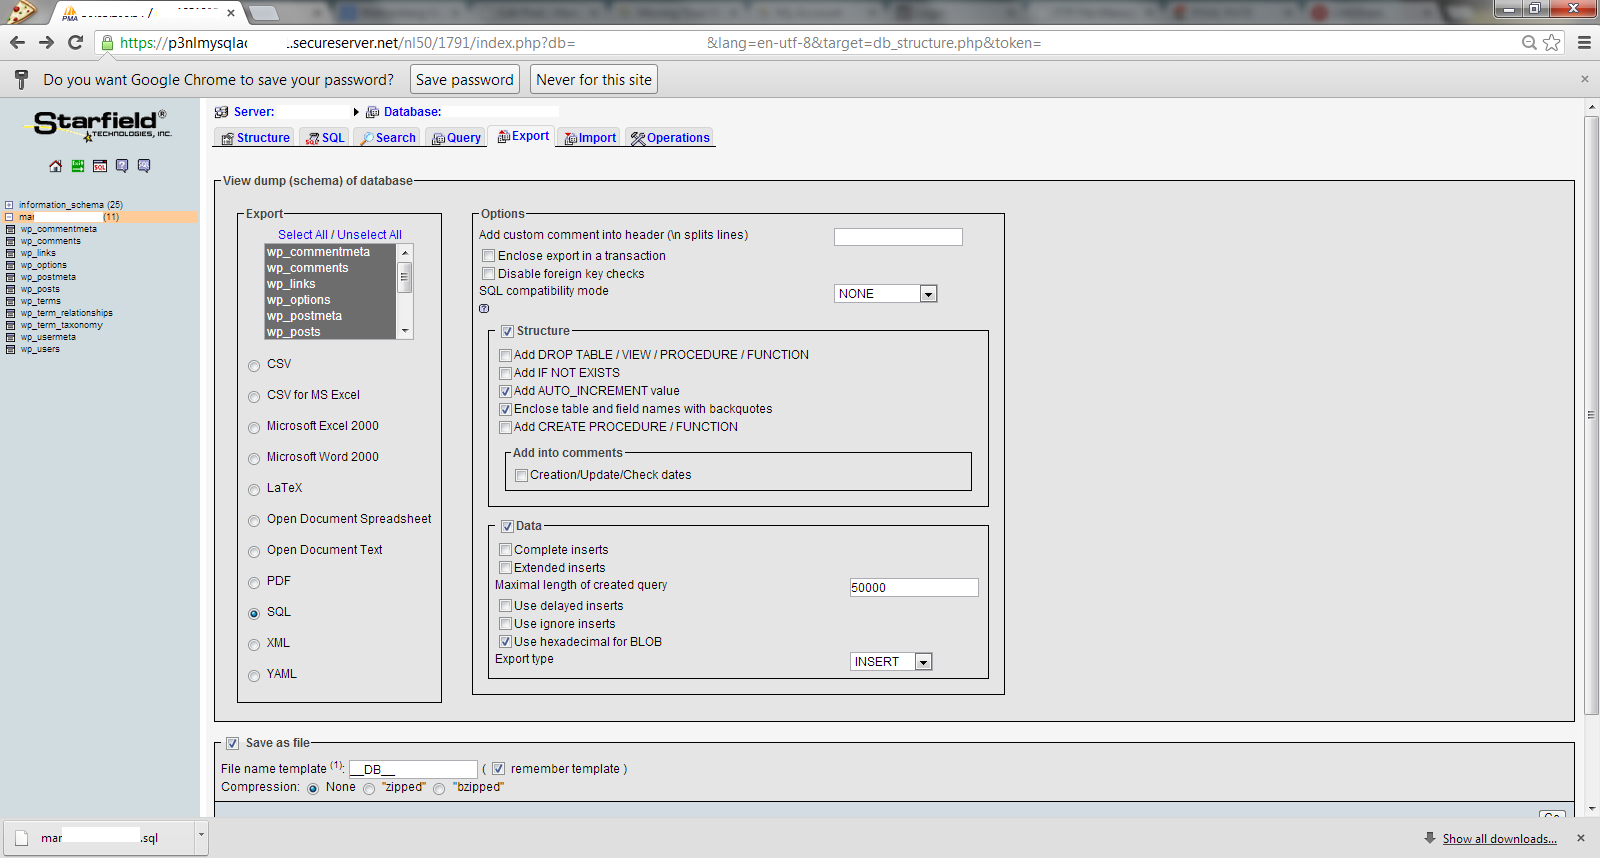
4. Click on the (+) next to your database and then select the tab “Export”, check the box “Save As File” and click “Go” in the bottom right hand corner. This will save the .sql file to your computer. (You can also export/import an .xml file for this database step, however it’s not a full backup; check out the From WordPress.com page for more info).
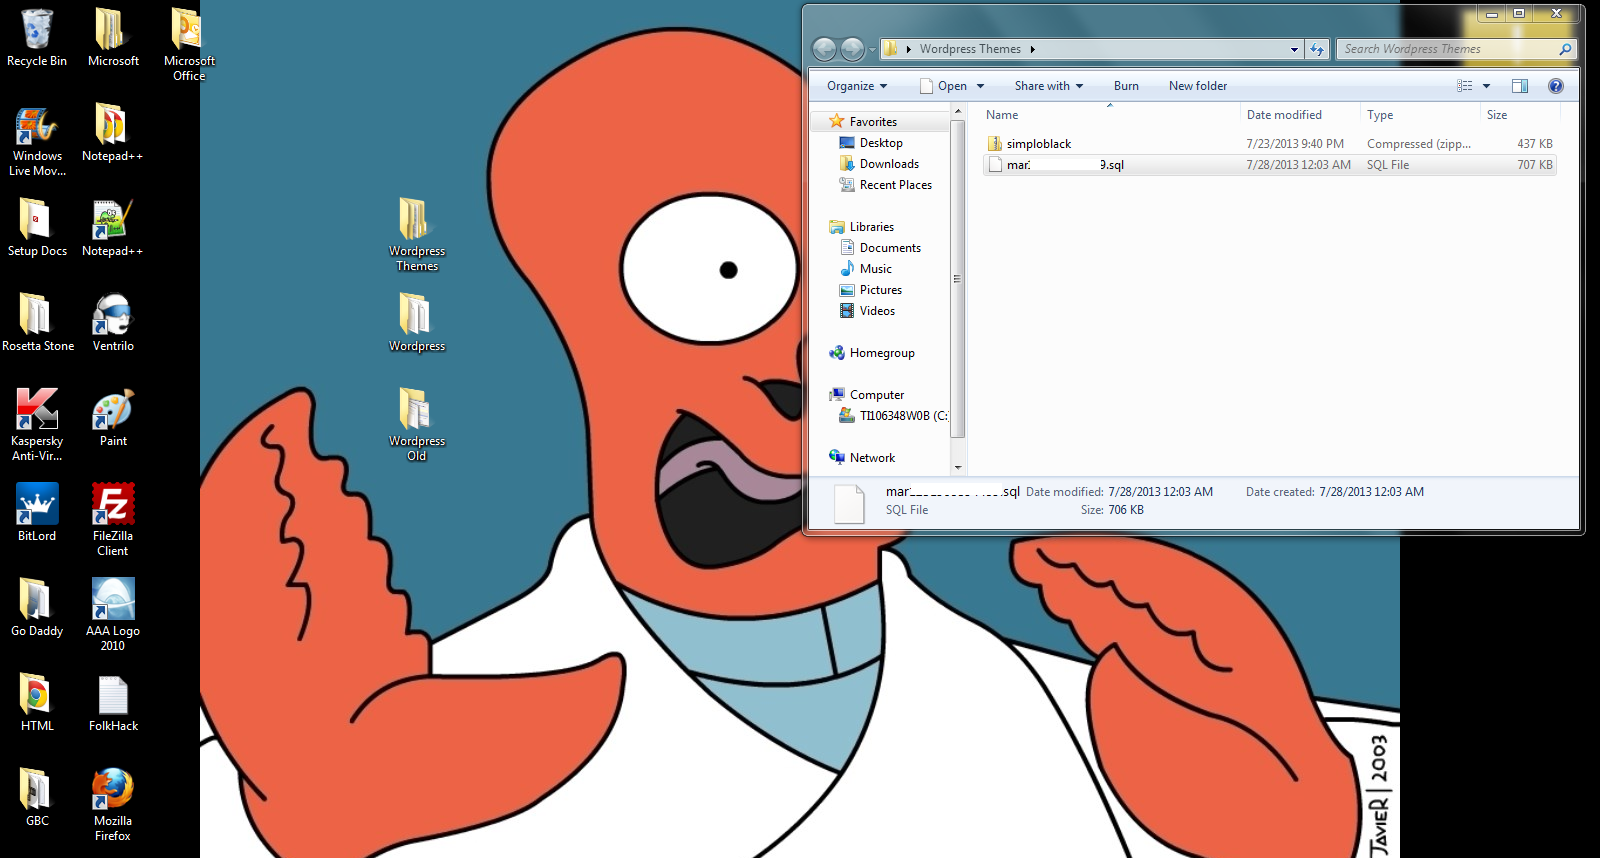
5. This is what your database file will look like on your desktop.
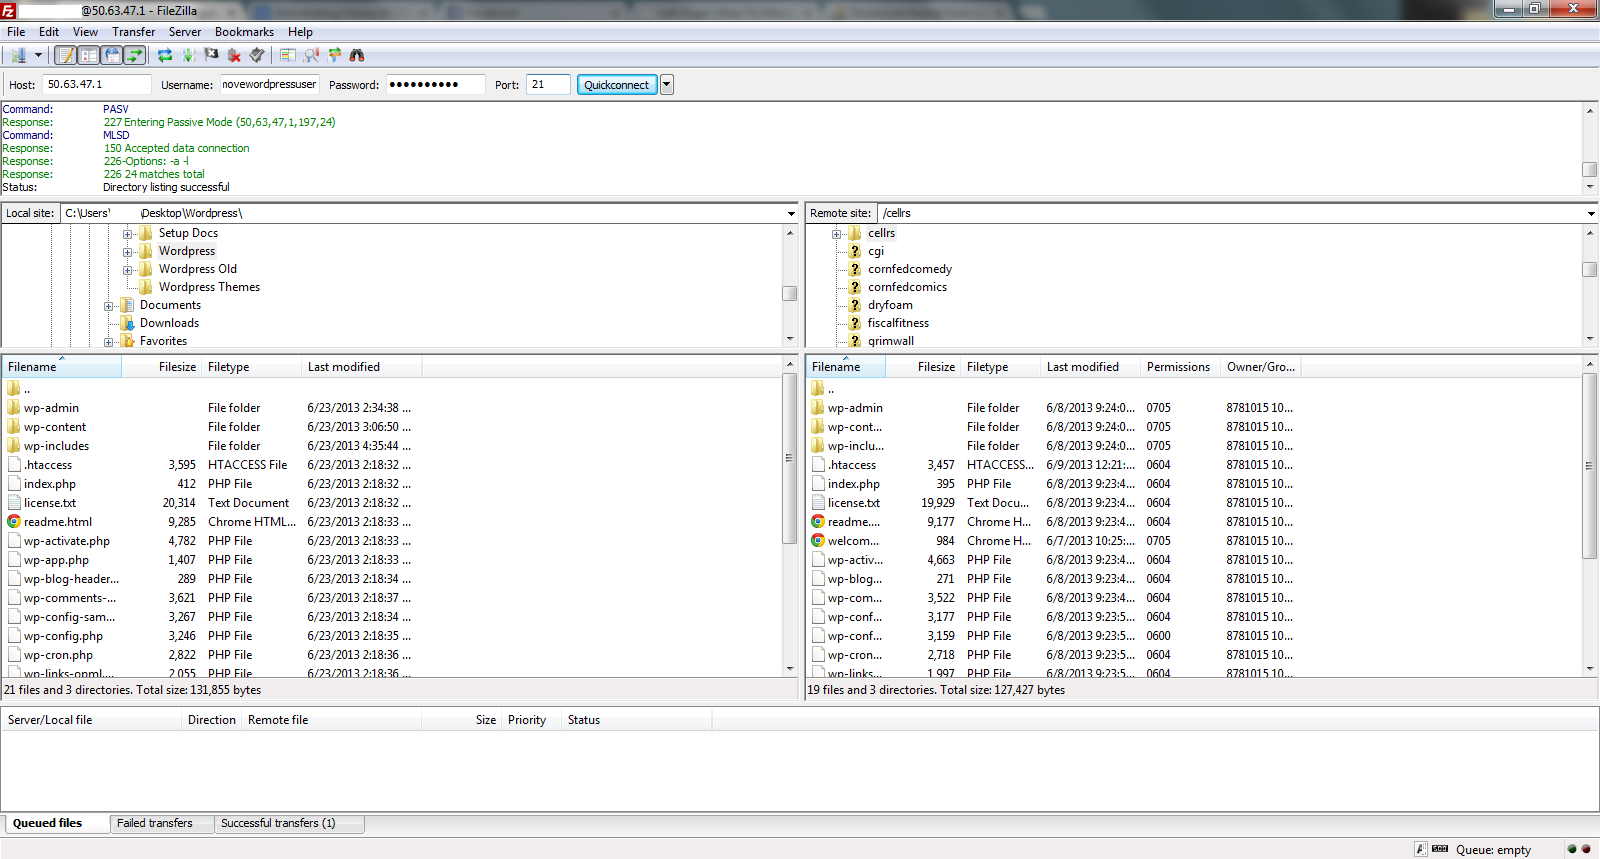
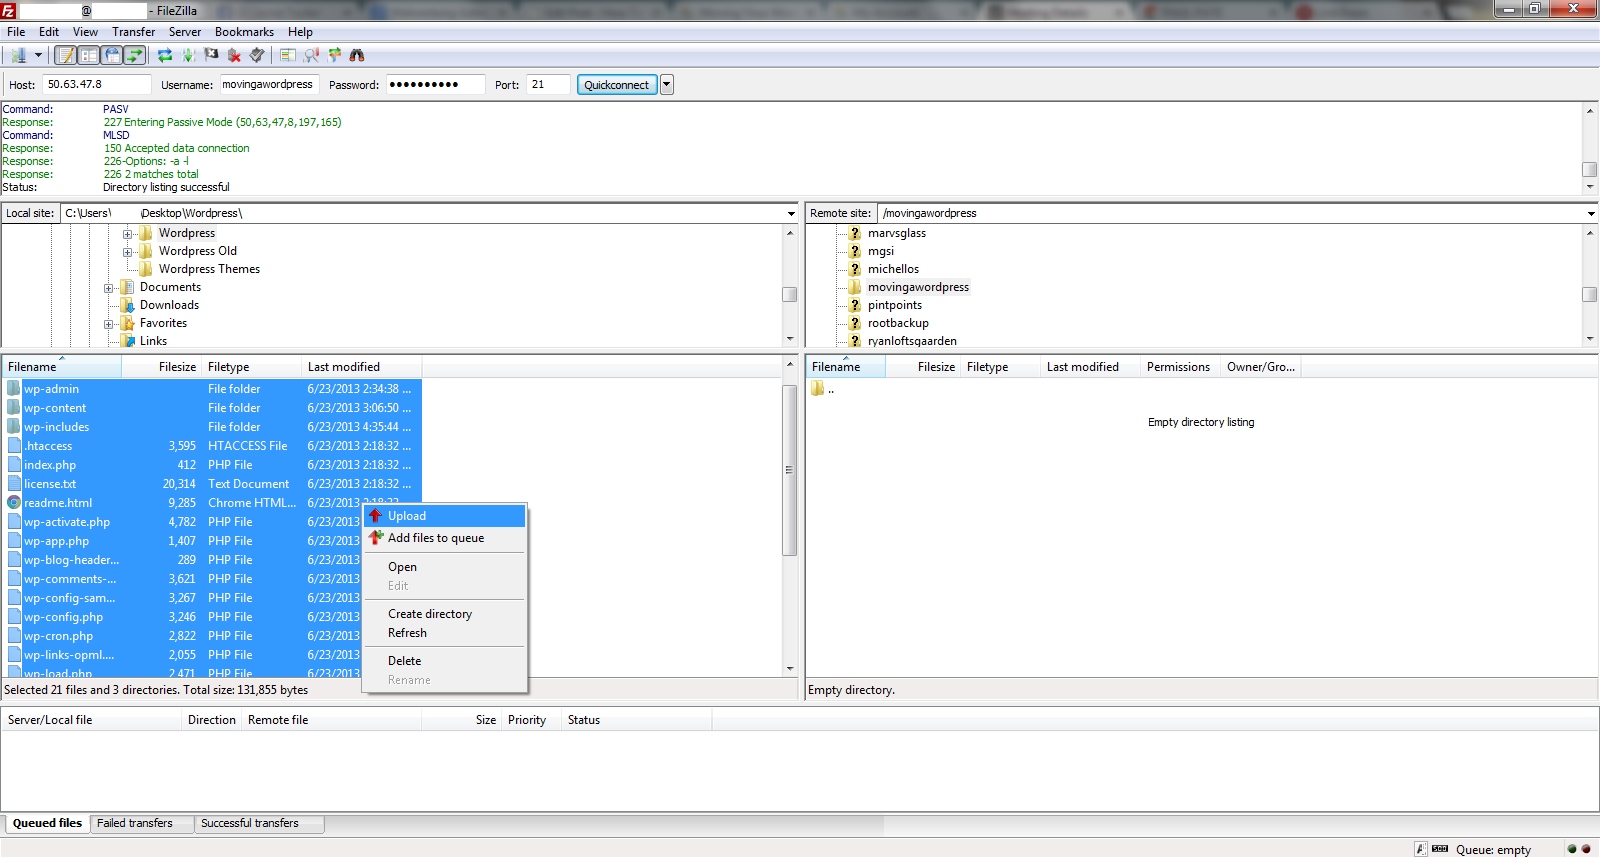
6. Once you’ve connected to your new hosting account through Filezilla, select your files from the “WordPress” folder on your desktop and right click the files and select “Upload”.
7. Create the new database at your new Hosting Company and if possible use the same Database Name, Username, Password and Hostname you found in the “wp-config.php” (Lines 19, 22, 25 and 28). If you don’t use the same credentials you will have to update these settings in the wp-config.php file to the new credentials you create with the database. (NOTE: On cPanel, hostname is “localhost”. )
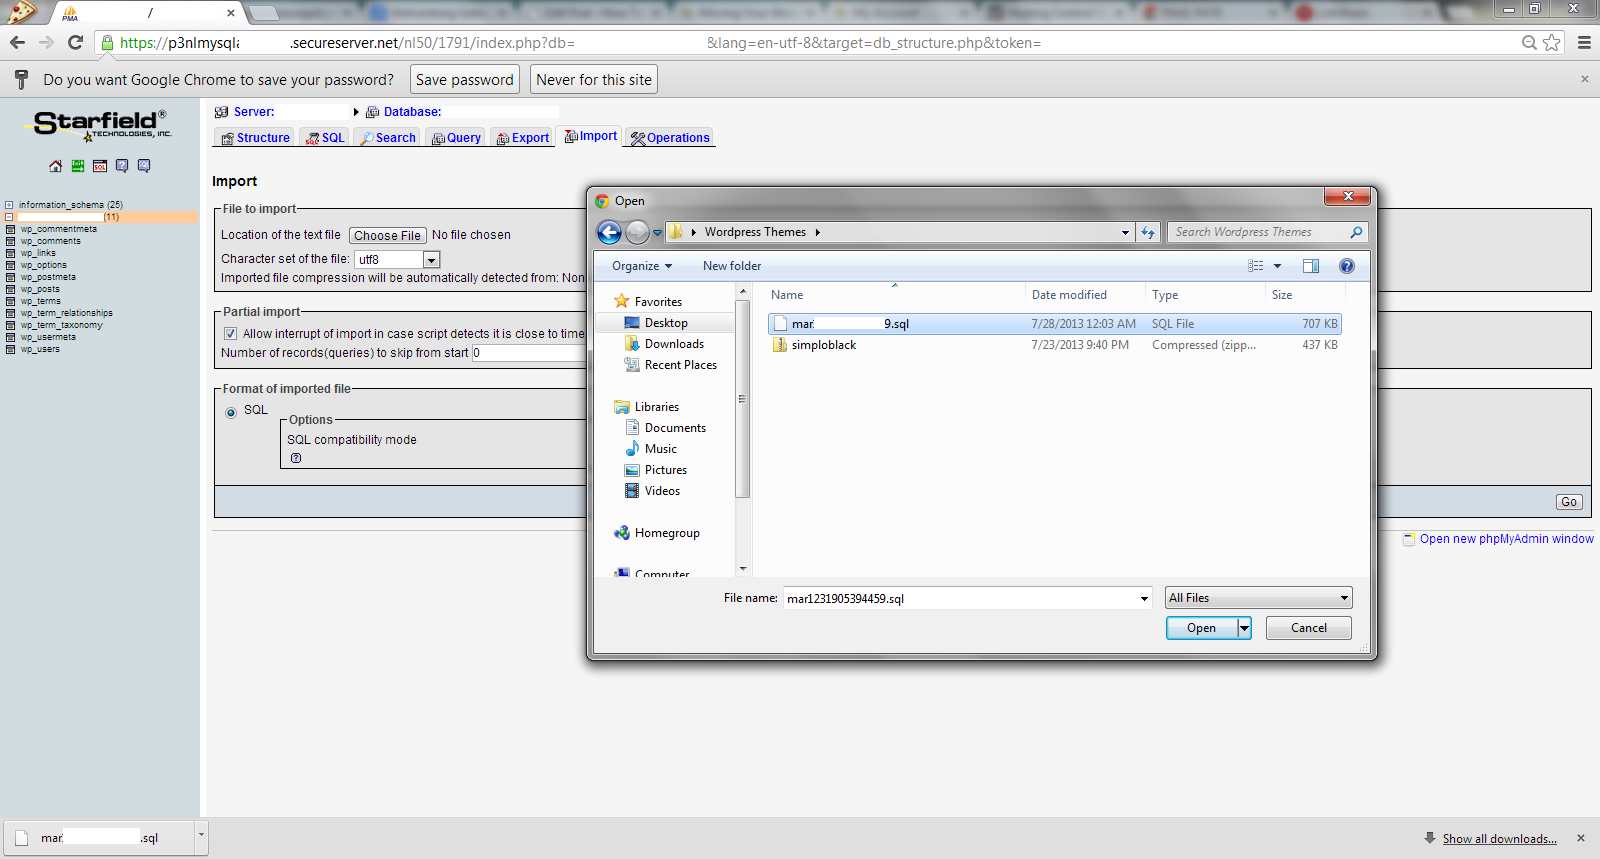
8. Log into your phpMyAdmin again, click the (+) next to your database name on the left, and select the “Import” tab. Click the button “Choose File” and select the .sql file we downloaded click on “Go” in the bottom right hand corner.
Congratulations you’re done! Make sure to go back in and update your Permalinks if any pages or image files were broken during the transfer. There are also a few plugins that can be used to move your site that might be easier. Duplicater or Backup and Move are the most popular ones, but you may want to read up on them before you decide which one to use. If your page still isn’t working, go over the steps again and make sure you followed them exactly, or make sure you have the correct Domain Name in the database. You can also move the database the same way we moved from WordPress.com by exporting the .xml file and re-activating your template. We hope you found this site useful while moving your WordPress site.